Why there is a Gap Behind the Jeans? and How to Fix it!
Finding a pair of jeans that fits is a regular thing of fashion frustration. The hip-butt-thigh ratio is so essential for a pair of perfect jeans. When it comes to finding the fitting jeans for your body, chances are you’ve come across the dreadful back gap or waist gap.
So, why do jeans gap in the back?
The term “gap” refers to an empty space or widening between two things. Back or waist gap means that your jeans fit snugly around your hip and thigh, but they gap around your waist and lower back. So the jeans have a lot of extra space at the back. It’s possible to sew it correctly with a few homemade tips and tricks. Also, some branded jeans are a safe bet because they’ll fit you perfectly.
You must still be mystified about this. But, to clear up any confusion, we’ve listed all of the factors with solutions below.
So, to cheer yourself up, read the detailed article.
You may also like:
how much does platos pay for jeans?
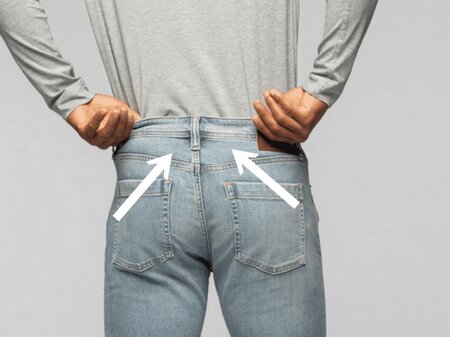
What Does It Mean When Jeans Gap in the Back?
You’ll see your jeans having a gap in the back if you’re curvier than others. For instance, this is a problem for ladies who have an hourglass shape.
Because wearing jeans can loosen up the back of the item. The back part actually means the back waistband of the jeans. Anyway this happens even more when you have a curvier body.
There’s really no other reason behind this annoying problem.
How Should Jeans Fit in the Back?
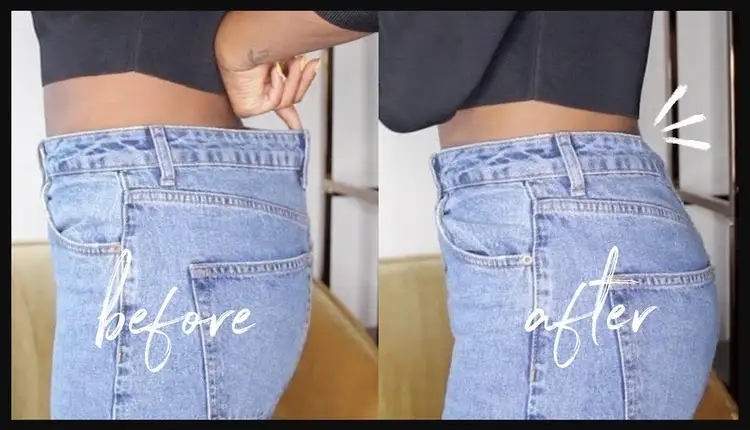
The hips of your jeans should be comfortable but not tight. The hip area of jeans may be difficult for you to fit in at times. Jeans, however, are difficult to fit because of their bespoke nature.
They’re too tight as soon as they start to bunch or tug in that place. Similar to the hip area, if it is too large, it will look bloated.
To tell if your clothing is too small, look for wrinkles on the inside of your body. This results in jeans that are too big because the wrinkles are facing outward instead of inward.
You should generally go with denim that fits your hip area the best. You may also want to consider having a tailor work on the waist for a better fit.
Not clear about the fix?
We have a dedicated section for the fix!
How to Fix Jeans That Gap in the Back?
[2 DIY Methods]
You already understand what a gap in the rear of your jeans indicates! The gap you overlooked in the fitting room because your jeans fit the rest of your body perfectly. The reason for this is that you forgot to sit while trying them on.
Given that you can sew, there is no reason to delay. Collect your materials! And then try the DIY techniques at home.
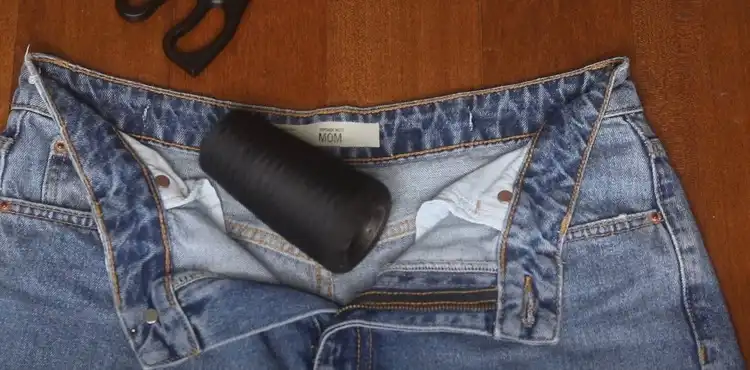
Method 1: Use Your Sewing Skills
The first method is about showcasing your sewing skills. So, if you’re confident about your sewing skills, let’s get started-
Materials You Needed
- Heavy-duty big safety pin
- Pins
- Sewing machine needle (Size 100 or a special denim needle)
- Seam rippers
- Wax tailor’s marking chalk
- Measuring tool
- Hammer or rubber mallet
- All-purpose thread
- Topstitching thread
Let’s check the diy method now. We’ve explained the method in simple steps below-
Step 1: Pin Up the Excess Back Part
Before anything, put your jeans on. Pin up your jeans’ center back seam. This way the center topstitching will fall to your jeans’ one side.
Now, start pulling the jeans’ waistband snug. Then get a safety pin and secure that excess part you see. Continue doing so down the jeans center back seam. This way you’ll pinch out the fabric’s excess part of the fabric.
This pinning part should be carefully done by a friend or family member. And do tell them not to pin the jeans with underwear. That would be disastrous.
Step 2: Mark the Pinned Area
Now, take your jeans off. Then start marking along the pinned seam. It should be done on your jeans’ inside.
Once you’re done marking, discard the pins carefully.
Step 3: Pull Out Stitching and Remove Central Belt Loop
Clip the jeans’ waistband stitching’s each line a half inch outside of the markings. Pull out the stitching section now.
Discard the jeans’ center back loop. Then clip your jeans’ corresponding threads away that’s on the waistband’s outside.
Separate the inner and outer waistbands properly. You can do this by clipping the waistband’s stitches that are at the top. Do this till you get to the chain stitches that are intact.
Step 4: Make a Mid-mark
Draw a vertical line where the belt loop was with chalk. Make a straight mark. Below the end of the marking of the center back seam start clipping your jeans’ chain stitching 1-1.5 inches.
Now, remove the chain stitches by pulling from the top. Lastly, discard existing exterior corresponding thread.
Step 5: Start Sewing
Pull the marking distance measurement of the waistband from earlier. You need to hide your new waistband seam under the jeans’ belt loop.
To do that start shifting the waistband markings’ center. This way it’ll lie between the lines of the topstitching and on one side.
If your pins are apart 2.5″, start shifting them to the right. This way the pins will be 1.25″ from your previous center back stitch lines’ middle.
If you wish to avoid excessive bother, there is one thing you can still do. Just draw a straight line on the true middle part of your waistband.
Next, start folding the waistband’s inner part on the straight line. The right sides of the waistband should be together.
Now, grab a sew allowance that’s ½ of the marking distance measurement. Then stitch the inner waistband of your jeans.
Sew, then trim, press, and turn the seam allowance.
Once done, pin together the right sides along your markings that you took earlier. To know if the pins are actually going through that marking, turn to the opposite side.
This way you can follow the markings and see in the previous fold line and then curve out. Once finished, pound the jeans yoke seam that you’ll sew across with a hammer.
If you’re satisfied with sewing, serge of the excess part. Turn the right side of your jeans out to give a good press to the current seat seam. Take the hammer and pound the seat/yoke seam intersection once again.
Step 6: Finish Up
Now, switch the matching topstitching thread. Leave the all-purpose thread inside your bobbin if you want. Then from the bottom up sew topstitching’s each line. Make sure you’re overlapping some stitches with the previous stitch line.
Once you’re all done, start clipping any existing loose waistband threads. After that, clip the ones on the topstitch.
Furthermore, hammer the jeans’ thick parts out. Also, reattach the jeans belt loop.
Lastly, wear your jeans. See if it fits properly. It should by now. If it doesn’t, do adjust the stitching.
Method 2: Use an Elastic Band
Now, wondering: how to fix loose jeans with elastic?
Well, it’s time for an easier solution. This requires sewing skills and an elastic. The steps are elaborated below-
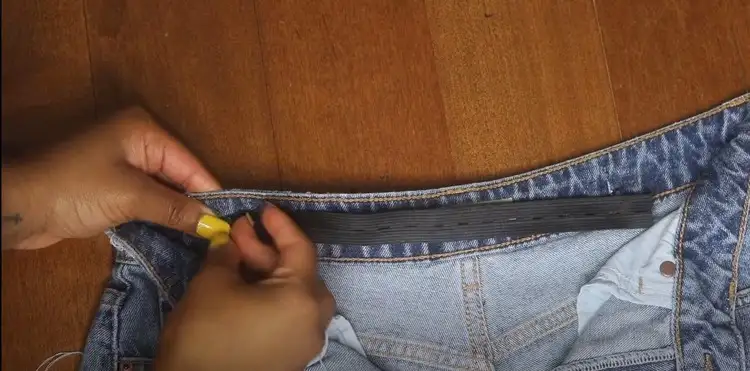
Step 1: Measure Your Jeans Waistband
First, turn the jeans inside out. Then start measuring your jeans’ waistband width. Once done, pick an elastic band that’s ¼ to ½ inches shorter than the actual waistband’s width.
Step 2: Cut the Opening for the Elastic
Start cutting an inch opening from the jeans button hole with scissors. The cut should be vertical. Do the same for the other side.
Step 3: Measure the Elastic
Now, wrap the elastic band around your waist to determine its length. Hold it a little tightly. Then mark that measurement to save it.
Step 4: Cut that Part of the Elastic
Minus the waistband length that’s not being covered by the elastic. Then cut it with your scissors.
Step 5: Insert the Elastic
Attach a medium sized safety pin to your elastic’s one end. Then start inserting that through the waistband’s holes. Keep doing so till that safety pin attached end is out of the other side of the waistband.
Step 6: Sew the Elastic to the Jean
Lastly, take your sewing kit. Then tuck the elastic band’s both ends. The band has to overlap the incision that was made on your waistband on both sides.
Choose the same color thread as your jeans. Then start closing the holes.
That’s it! You’re all done!
You may also like:
Are Guess jeans good quality?
How Do You Fix the Waist Gap without Sewing Jeans?
You can also adjust the waist without sewing if it’s too big. You can do it by washing or boiling the jeans. You can easily alter your jeans at home like this if you have no sewing skills.
Without further ado, let’s get into the step-by-step instructions-
Wash or Boil the Jeans
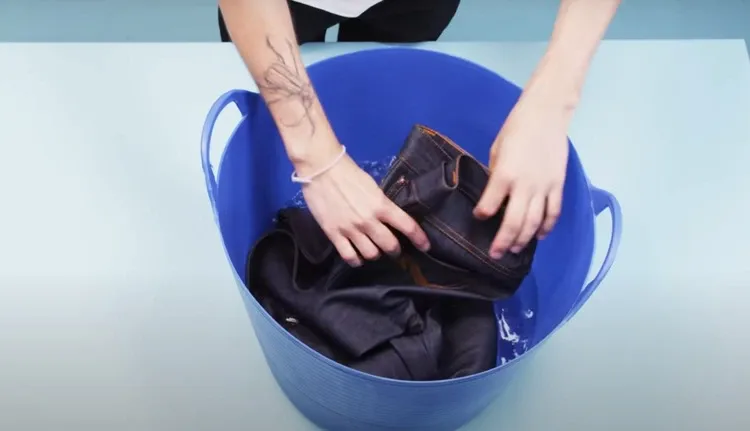
First method is super easy. You just have to wash and dry your loosen up jeans. If it’s still loose, you can boil it.
Anyways, let’s get into the details-
Step 1: Wash the Jeans
Avoid washing your clothes with others. Avoid fabric softener. This is because tumbling shrinks the fibers, so a front-loading washer has a bigger impact. If you don’t have one at home, locate one in your area.
Wash inside-out jeans. It saves the jeans’ life. For preshrunk or synthetic jeans, this method doesn’t work as well.
Hot water can be used to soak your jeans as well. Immerse the jeans. Submerge the jeans entirely with a wooden spoon. After the water cools, wring them.
Step 2: Dry the Jeans
Dry them on the highest heat. Try to lengthen the drying time. Make sure you read the label before you start! It is against the guidelines to dry them too small in the dryer. If so, let them dry naturally.
Step 3: Try on the Jeans
Your jeans need to be more snug. Insist that they are comfortable. This method is temporary. They will lose their “comfy” shape with wear. Jeans lose strength and appearance with each wash and dry. Use this method sparingly.
Step 4: Boil the Jeans [Optional]
If the jeans keep getting loose, you can try this method. Pick a pot that is both clean and spacious. It’s ready when the water reaches boiling point in the pot.
Regularly check the pot. If needed, add more water. After the water comes to a boil, turn the heat down. Boil the jeans for 20-30 minutes. Then let the jeans dry. That’s it!
Recommended Jeans That Have No Gaps In The Back
We have recommended some jeans below. They can be worn by women of all shapes and sizes. And you’ll face no gap at the back too.
Perfect Curvy and Skinny Jeans

These Angel Forever Young jeans are suitable for women of all shapes. The brand’s special feature is the slimming tummy tech. This gives a smooth and curvy fit so you won’t see the gap at the back.
Completely Shaping Perfect Pull on Skinny Jeans

This shaping pull on jeans is a must for you. These jeans by Levi’s will highlight the best features you have. There’s a guarantee that you’ll feel absolutely comfortable wearing these jeans. And you can say goodbye to the loosen back problem! Because the jeans will hold on to your figure.
Bottom line
Hopefully, you’ve realized why do jeans gap in the back. Furthermore, you can now fix the issue. Because we’ve talked about DIY methods.
But you may not be able to do this on your own. Do not hesitate to ask the specialist, your nearby tailor for help if needed.
We wish you the best of luck in your endeavor!


